Hey everyone, it’s me, Dave, welcome to our recipe site. Today, I will show you a way to make a special dish, glazed kiwi cheesecake. It is one of my favorites food recipes. For mine, I’m gonna make it a little bit unique. This is gonna smell and look delicious.
Remove. strawberries and kiwi fruit over glaze. To make topping: Stir together yogurt cheese, sugar and vanilla in a small bowl. Ah, the layers of this Kiwi cheesecake get better and better—from the crumbly buttery biscuit base to the soft cheesecake in the middle, to the lemony kiwi glaze on top.
Glazed Kiwi Cheesecake is one of the most popular of recent trending foods on earth. It’s appreciated by millions every day. It’s easy, it’s fast, it tastes yummy. They are fine and they look fantastic. Glazed Kiwi Cheesecake is something that I’ve loved my whole life.
To begin with this recipe, we must prepare a few components. You can have glazed kiwi cheesecake using 14 ingredients and 17 steps. Here is how you can achieve that.
The ingredients needed to make Glazed Kiwi Cheesecake:
- Take 20 digestive biscuits
- Take 5 tbsp melted butter
- Get 2 kiwis
- Make ready 3/4 cup water
- Make ready 4 tbsp sugar
- Prepare 2 cup heavy whipping cream
- Take 4 tbsp cheese spread(plain)
- Prepare 3/4 cup castor sugar
- Take 5 tsp gelatine
- Make ready 4 dash green colour
- Get 1 kiwi
- Make ready 2 tsp gelatine
- Take 3 tbsp sugar
- Prepare 4 dash green colour
Honey Glazed-Baby Kiwi Mascarpone Cheesecake Recipe. AKA Baby Kiwi, are without question a good thing in a small package! To serve, dissolve the lime jelly crystals in hot water and let the jelly cool but not set. Arrange the sliced kiwifruit decoratively on top of the chilled cheesecake and spoon over the lime jelly.
Instructions to make Glazed Kiwi Cheesecake:
- FOR BASE:crush biscuits roughly and add melted butter n mix well
- Press crushed biscuits at the bottom of a loose round bottom tin n place in the fridge to set
- Puree 2 kiwis in a mixer n boil this puree,3/4 cup water n 4 tbsp sugar in a pan,stirring continuously on low heat.Simmer for 2 minutes n remove from heat
- Sprinkle gelatine on 1/2 cup water kept in microwave proof bowl.Keep aside for ten minutes.Microwave for 20 seconds to dissolve it.
- Add this gelatin to kiwi mix
- Take a large bowl n beat cream with electric beater till stiff peaks form
- Now add cheese spread,1 cup castor sugar n beat again till mixed properly
- Add kiwi puree n beat very well so that the gelatine gets thoroughly mixed(gelatine will help in setting of the cheesecake)
- Add few drops of green colour(optional)
- Pour this creamy mixture over the biscuit base n tap so that it is evenly levelled.Keep.in fridge for 3-4hrs to set
- FOR GREEN GLAZE:
- Soak 2 tsp gelatin in 1/2 cup water.Heat on low flame stirring continuously until gelatin dissolves.
- Add puree of 1 kiwi and 3 tbsp sugar.
- Simmer for 1min on low heat to dissolve sugar,remove from heat n add a few drops of green colour n mix well
- Pour the green glaze over the cheesecake n keep in the fridge again to set
- NOTE: the green glaze should only be poured on the cheesecake when it is set
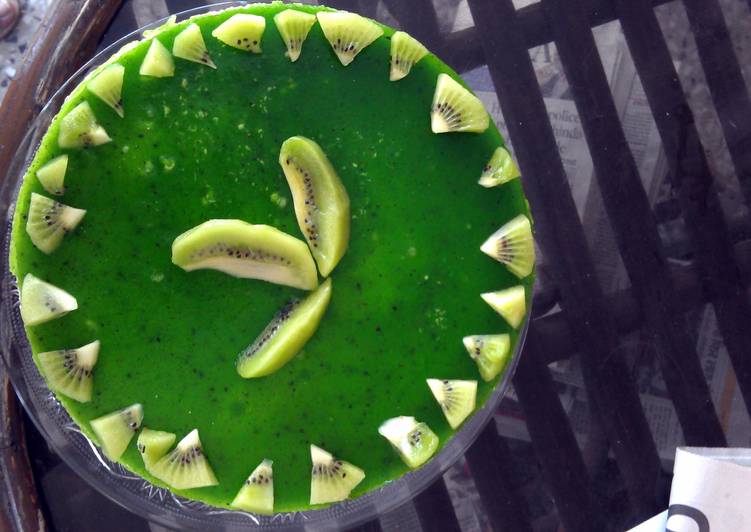
- Cheesecake can be decorated by cutting small pieces of kiwi n placing them on cheesecake!
Combine the graham cracker crumbs, sugar and melted butter in a bowl. Stop by, call for delivery, ship nationwide. We also have Camp Cheesecake, our cheesecake on wheels truck, ready for any event you have! Use properly ripe kiwis to get the perfect taste and avoid the sourness. In case kiwis are not available or not to your taste, you can substitute it with cherries or strawberries.
So that’s going to wrap it up with this exceptional food glazed kiwi cheesecake recipe. Thanks so much for reading. I’m confident that you can make this at home. There is gonna be interesting food at home recipes coming up. Remember to bookmark this page in your browser, and share it to your loved ones, colleague and friends. Thank you for reading. Go on get cooking!